


- All
- Payment Profiles
- Colour Calibration
- Printing
- ROES Troubleshooting
- Product Customization
- General Questions
- Shipping
- Getting Started
- DNP Printers
- eStore
- Order Tracking
You can check the status of your orders, track shipments and see estimated completion dates using our Order Tracking system.
Once you are signed on with your email address or account number and password browse to https://technicare.com/order-tracking/
Available from the convenience of your smartphone whenever wherever!
Browse https://ordertracking.technicare.com to just to track your order.
Yes, we do. Our Dropship program can save time and simplify workflow by having orders sent directly to your clients. All invoices and Technicare branded paperwork are removed from drop shipped orders.
Ship -Letter Rate (Canada and USA): This service is designed for smaller print orders that can be sent in sturdy cardboard mailers up to a maximum print size of 8″x12″ and weight of 500 grams. Orders can
be sent to any address in Canada or the USA. Completed packages will always indicate your studio location for a return address. This service, using Canada Post, is the most
economical but is not traceable and no guarantee of delivery is provided. Costs associated for reprinting orders that fail delivery falls on the studio.
Drop Ship -Parcel Rate Canada: This Drop Ship service is fully traceable and comes with guaranteed delivery. The cost of Parcel shipping is based on order content (size, weight and value) and is calculated on the checkout screen when the order is being prepared for submission.
Drop Ship -Parcel Rate USA: This Drop Ship service is also fully traceable and comes with guaranteed delivery. The cost of Parcel shipping is based on order content (size, weight and value) and is calculated on the checkout screen when the order is being prepared for submission.
For custom sized prints your image needs to be sized to exactly what you require.
You will need to select the next largest size to the size you require.
For example, if you need an 18×38 you will need to select a 20×40. Your file must be sized to the size you want output (18×38).
(Generally, we can only do custom sizing to the closest ½”.)
Once you drop the image into the panel you will need to select the Crop or Fit button, which appears when you click inside the main panel.

Please let us know if you want the white trimmed off in the special instructions area upon checkout.
You must also put a note in the special instruction indicating it is a custom size and the specific size you want.

You need to specify the exact size you need.

Steps to correct small display size of the ROES client on a 4K monitor. This is only an issue on a PC.
Go to this location:
C:Program Files(x86)\ROES\TechnicareClassicROESWebStart.exe
Highlight ROESWebStart.exe, right click and select Properties.
In Properties select Compatibility tab.
Click on “Change High DPI Settings”
Turn on “Override high DPI scaling behaviour. Scaling performed by:” and select “System” from the drop down menu.
Click Apply/OK, close all windows
Relaunch the ROES Client
The warranty period begins on the date of your purchase as evidenced by a sales invoice or proof-of-purchase. This limited warranty is applicable to Customers who purchase and use the Printer in the 48 contiguous United States and/or Canada. The coverage is for Parts and Labour only. See Table below for details.
| Printer | Warranty Period | Coverage |
|---|---|---|
| RX1/RX1HS | The earlier of 1 Year or 30,000 prints (4×6″) | Parts and Labour |
| DS620A | The earlier of 1 Year or 60,000 prints (4×6″) | Parts and Labour |
| DS40 | The earlier of 1 Year or 40,000 prints (4×6″) | Parts and Labour |
| DS820A | The earlier of 1 Year or 15,000 prints (4×6″) | Parts and Labour |
| DS80 | The earlier of 1 Year or 10,000 prints (4×6″) | Parts and Labour |
During installation of the native install on a Windows platform the error is thrown when the install is at the “removing backup files” point.
Error 1001: Exception occurred while initializing the installation.
System.Argument Exception: String cannot have a zero length..
Acknowledging the error then removes the application.
The error is caused by files left over from a previous, other client installation. These files are located in
C:Users\<THEUSER>\AppData\Local\Temp NOTE: AppData is a hidden folder
Three files can be present. RWSCleanup.dll, RWSCleanup.InstallState and RWSCleanup.txt.
Delete all three and then run the install again.
Deleting the files will not impact existing installations.
We no longer accept or process film. We’re 100% digital.
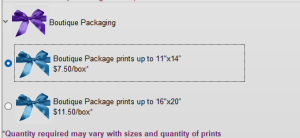
Our Boutique Packaging Service is designed to impress and enhance the presentation of your finished work.
Prints up to 16″ x 20″ unframed are sealed in clear acetate bags, wrapped in colour-coordinated tissue and placed in black presentation boxes. A ribbon around the box adds the finishing touch.
Boutique packaged orders can be drop shipped directly to your customer or shipped to your studio location.
Price for Boutique packaging is a flat rate of $7.50 for orders up to 11″x14″ in size and $11.50 for orders up to 16″x20″ in size. This can be added to your order in the ROES shopping cart screen.
We also carry a wide range of professional presentation products. Products can be ordered by selecting the eStore tab on our website. There will be an additional freight charge applied to your invoice when shipping all merchandise. Cost of freight is calculated based on weight, size, and ship-to location. eStore orders can also be tracked using our Order Tracking System.
To find your external hard drive in the ROES interface click the “Add Images” button and navigate to your Macintosh HD from the drop down menu. Scroll down to the “Volumes” folder and double click to access any external drives that may be connected.
We strongly recommend you ensure the card entered in your Payment Profile has enough credit available to transact your ongoing invoices with us. Using Bambora’s secured portal to transact payment on your behalf is not a free service to Technicare. All transactions, whether approved or declined come at a price; it is a cost of doing business in today’s environment. Unfortunately, we can not absorb this cost when transactions are declined and as such a $1.00 charge may be applied when transactions are declined by your card provider. Of course, our customer service personnel will contact you should a card transaction be declined.